SSH tutorial
Introduction
In order to secure the University of Toronto Mathematics network
we are encouraging users to start using encrypted protocols such as
"ssh" and "scp" to log into our machines and transfer files between
them. Older programs such as "telnet" and "ftp" transmit all
information as plain, human-readable text, which represents a
security risk since it is very easy for a would-be intruder to
capture passwords and other sensitive information. Please
read this document in its entirety before using "ssh". If
you have any questions or comments regarding this web page or these
programs please feel free to send an email to the Math system
administrators at:
requests@math.toronto.edu.
Using SSH on various platforms
[Windows] [Linux and Unix] [Mac]
= Windows =
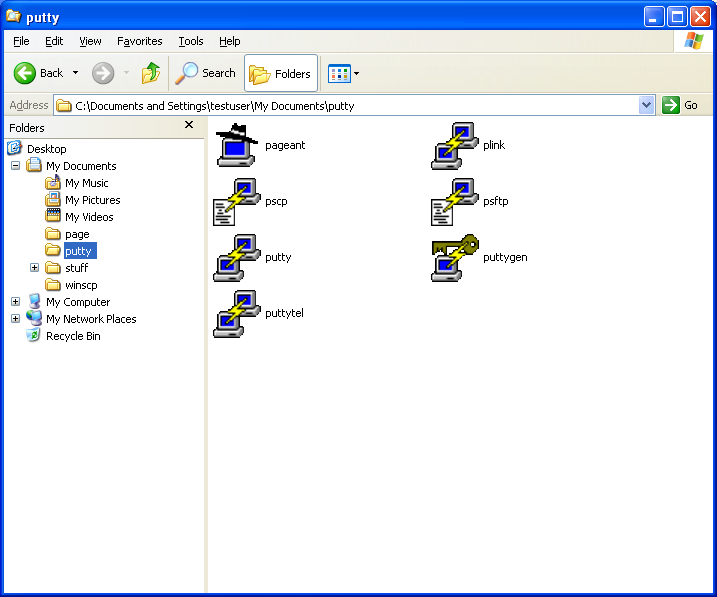
For the Windows platform we suggest downloading
PuTTY,
which is a free ssh client. Installing requires downloading the
following files (v. 0.57):
and saving them into a directory of your choice.
Below is a step-by-step guide for the installation and use of the PuTTY files
mentioned above
(click on the images to enlarge):
|
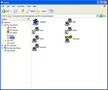
The two executables you'll use actively are "putty" and
"pscp".
|
 |
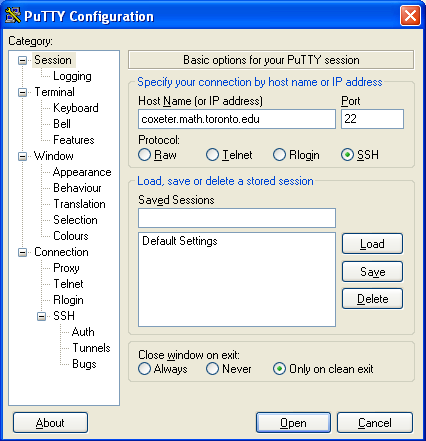
To ssh into the department, double click on the "putty" icon.
This will open a window called "PuTTY Configuration" like the one
shown on the left. Click the SSH radio button and
write coxeter.math.toronto.edu in the Host
Name (or IP address) field.
|
 |
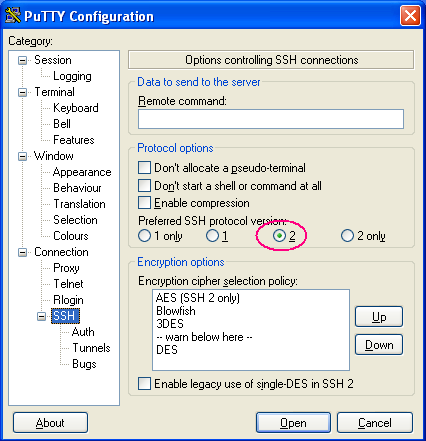
Make sure 2 is selected from the Preferred SSH
protocol version field located under Connection -
SSH.
|

|
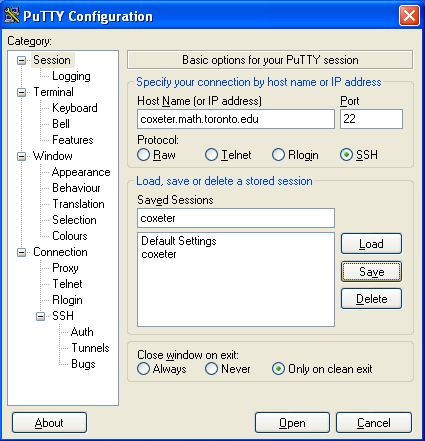
If you would like to save your settings for future sessions go
back to Session and type a name under
Saved Sessions. After clicking
Save the name will appear in the large box to
the left of the button. You can then Load the
settings again next time you start PuTTY. You can now click on
Open to connect.
|

|
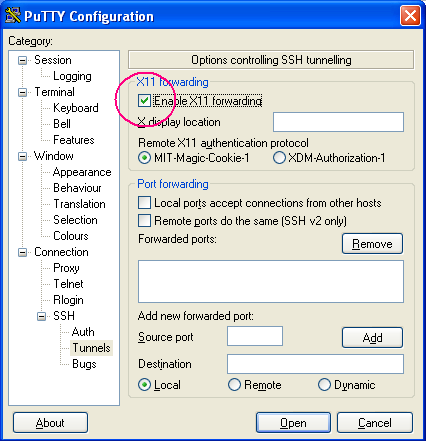
If you have an X Windows server installed (such as eXceed) and would
like to open windows through an encrypted tunnel select
Enable X11 forwarding. This is an advanced feature,
however, so please ask your systems
administrator for assistance if needed.
|

|
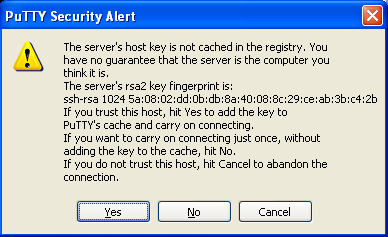
The first time you connect you will see the dialogue box shown
here. Click Yes to continue. This
message should only appear the first time you connect! Otherwise
contact your systems
administrator.
|
 |
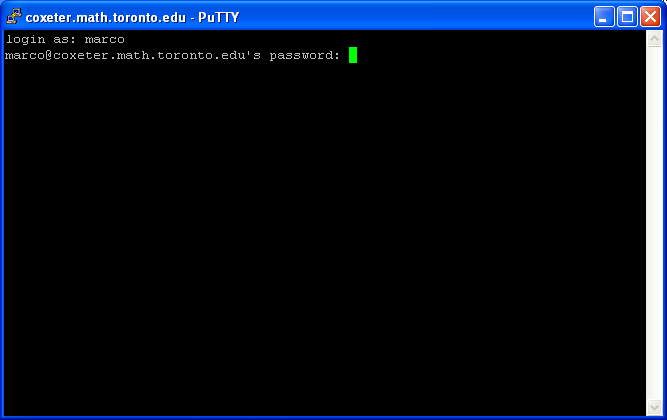
You can now log into the system.
|
 |
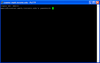
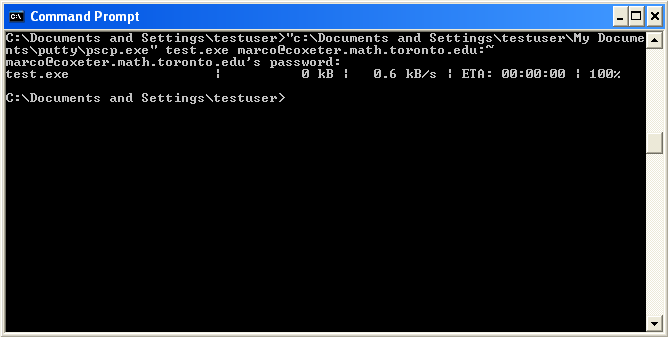
To copy files securely you will need to use pscp. The first step
is to open a "Command Prompt" window as shown to the left. In some
versions of Windows this icon is called "MS-DOS" and may be located
in some other location under the "start" menu.
|
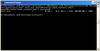 |
Here is a sample transfer. Note that you must write the full
"pscp" path (alternatively you can add the location of pscp.exe to
your PATH variable under Windows if you know how). The syntax is
similar to that of scp as discussed below. Note
that another, simpler alternative is to use WinSCP (see below).
|
Some people find it easier to work with a graphical interface
instead of the command-line pscp command. Another possibility in
this case is to use a program called
WinSCP.
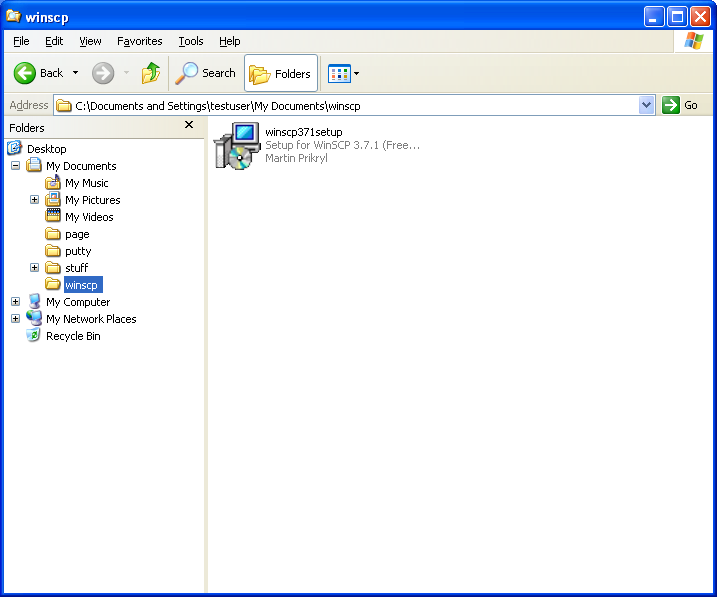
First you need to download the following file (v. 3.7.4):
Below we explain how to use it:
|
WinSCP
|
 |
When you download WinSCP you'll find an icon like
the one shown to the left. Double-click and follow the instructions
on how to install (an install wizard will appear after
double-clicking). It is recommended you do this as Administrator.
|
 |
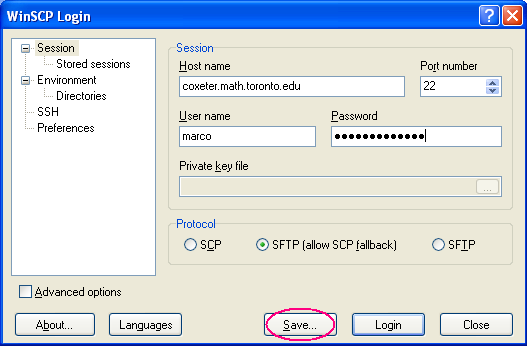
The entries here are pretty self-explanatory. Choose the
appropriate host if not connecting to coxeter, otherwise just
follow the example shown.
Session parameters can be stored for future use
using the Save button.
|
 |
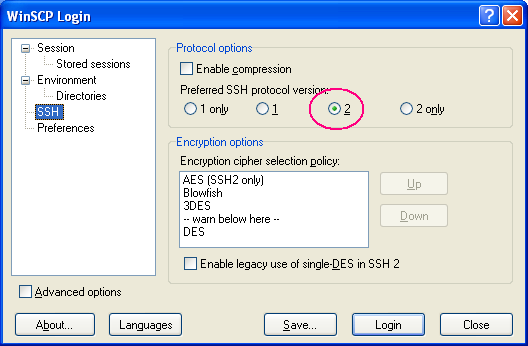
Make sure 2 is selected from the Preferred SSH
protocol version field located under Environment -
SSH.
|
 |
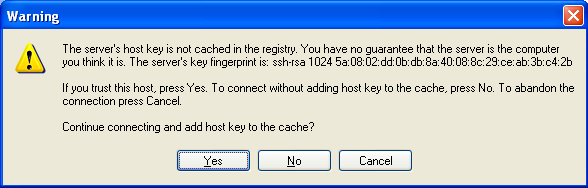
The first time you connect this box will appear. Click
OK. This message should only appear the first
time you connect! Otherwise contact your
systems administrator.
|
 |
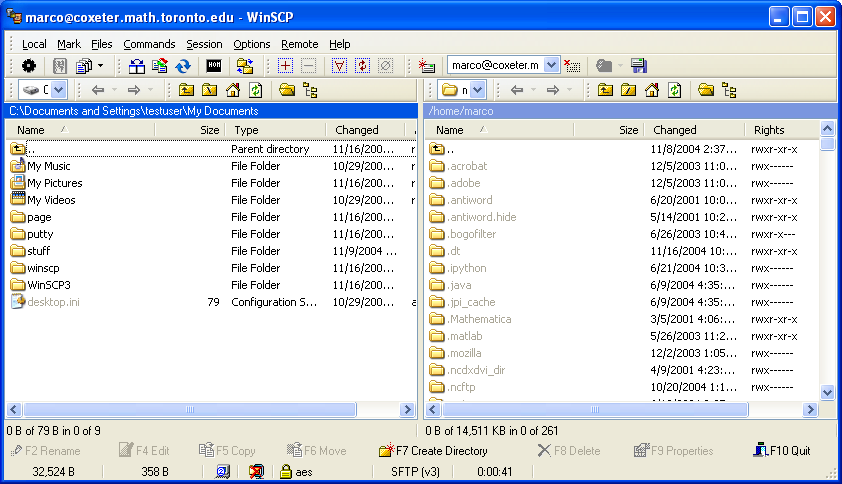
You can now copy files back and forth between computers.
|
= Linux and Unix =
If you use a reasonably modern version of Linux or *BSD (i.e.
any distribution available since 1999) it should come with
openssh installed. If not the files
are available at www.openssh.org.
The generic use of these commands is as follows:
   ssh computername

   scp myfile.ext computername:/path/to/file/

   scp computername:/path/to/file/myfile.ext /local/path/
The table below summarizes the use of ssh and scp via various
examples:
|
SSH EXAMPLES:
|
SCP EXAMPLES:
|
 Jane is on "coxeter" and wants to log into "janepc":

    ssh janepc

 Conversely, if Jane is on "janepc" and wants to log
 into "coxeter":

    ssh coxeter

 Suppose that Jane's account name on "janepc" is "jjane"
 but her account name on "coxeter" is simply "jane".  From
 her computer she should type:

    ssh jane@coxeter

 to log into "coxeter". Use the "-X" option to be able
 to open windows over your ssh session (so that you can
 open an xdvi session from coxeter, for example):

    ssh -X coxeter
|
 We assume you are logged on to YOUR personal computer
 ("~" is equivalent to your home directory "/home/yourname"):

    scp file1.tex coxeter:~/mylatex/       (copies file1.tex TO coxeter
                                            "mylatex" directory)

    scp coxeter:~/mylatex/file1.tex ~/Q1/  (copies file1.tex FROM coxeter
                                            TO local "Q1" directory)

    scp ~/pix/*.jpg coxeter:~/mypix/       (copies all .jpg files TO
                                            "mypix" directory on coxeter)

    scp coxeter:~/mylatex/'*'.tex .        (copies all .tex files FROM
                                            coxeter "mylatex" directory
                                            TO the local directory in
                                            which you currently are in
                                            [the one you get by typing
                                            "pwd"].  NOTE: the asterisk is
                                            in single quote marks here since
                                            you want it interpreted on the
                                            remote machine, coxeter)

 If you are ON COXETER the syntax is the same but instead of "coxeter:"
 above you would type "computername:" e.g.

      scp file1.tex computername:~/mylatex/
|
For more information you can type sshinfo and
scpinfo at the coxeter prompt, or run
man ssh and man scp.
For access to a linux graphical front-end which is similar to winscp you
can type gftp at the command-line (or click on the icon if available).
= Mac =
Even though it is well-known for its elegant user interface,
Mac OS X is a robust Unix-based operating system containing all the power and
functionality that Unix and Linux users are accustomed to.
Accessing coxeter with ssh is extremely simple in
Mac OS X since openssh is built in. This section assumes that you have some
familiarity with the Mac OS X user interface. If not, choose Mac Help
from the Finder Help Menu to learn about Mac OS X.

|
The easiest way to log into coxeter is to open
Terminal which is
located in your Applications >> Utilities folder.
|

Using the Finder window to open Terminal
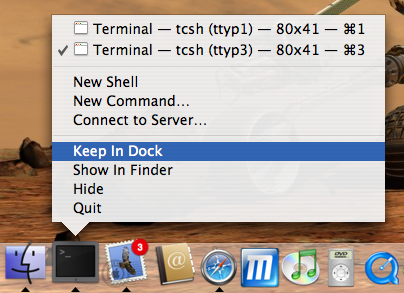
If you plan on using Terminal extensively to access coxeter, we
recommend that you place Terminal in your Dock
[screenshot]. Once you have
connection to the Internet and you have a Terminal window open, you can use
the normal Unix commands as described in the
Unix and Linux section above to log into coxeter.
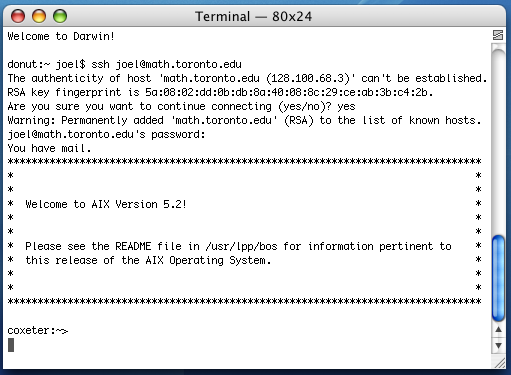
Logging into coxeter for the first time using
Terminal.

|
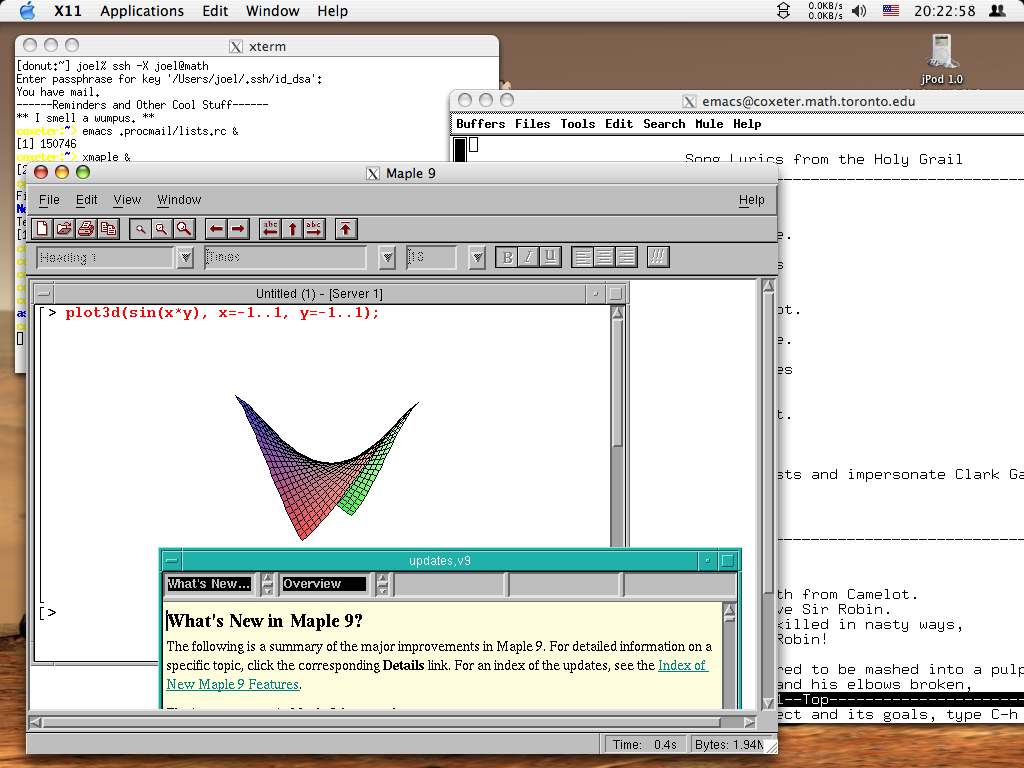
If you wish to
use X Windows applications on coxeter such as
xdvi, emacs, or xmaple, you can run
X11 instead.
|
X11 requires Mac OS X 10.3 Panther, 10.4 Tiger, or 10.5 Leopard. X11 is not installed by default on Panther or Tiger, but it
is included in the Mac OS X Panther Install Disk 3 CD or the Mac OS X Tiger Install DVD.
Once installed, X11 is also located in the
Applications >> Utilities folder.
Once X11 is open, a Terminal window opens and you may use ssh -X to
log into coxeter. Witness an
X11 session in action with X11 applications open:
Half-size screenshot |
Full-size screenshot.
Running remote applications with X11 takes up a lot of network bandwidth, so
a broadband (or direct ethernet) connection is required.

|
Files can be transferred between your Macintosh and your coxeter
account in Terminal using the scp or sftp commands as
explained in the Unix and Linux section. However,
those who prefer a graphical interface program can try
Fugu, an award-winning
open source sftp and scp utility by the University of
Michigan.
|
Fugu requires Mac OS X 10.2.3 or higher.
The Universal binary (which supports both
PowerPC- and Intel-based Macs) is available as a
free
download. After you download the disk image file and agree to the License,
Fugu will be installed in the default save folder that is set by your
web browser. You should take the opportunity to move the program file to your
Applications folder.
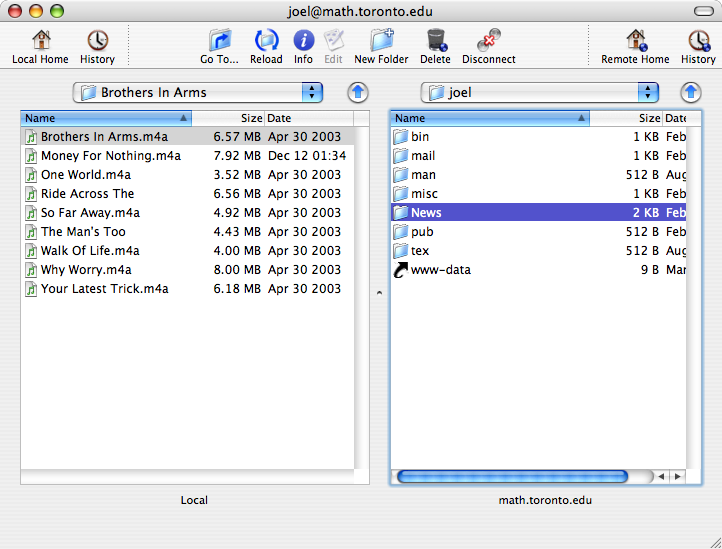
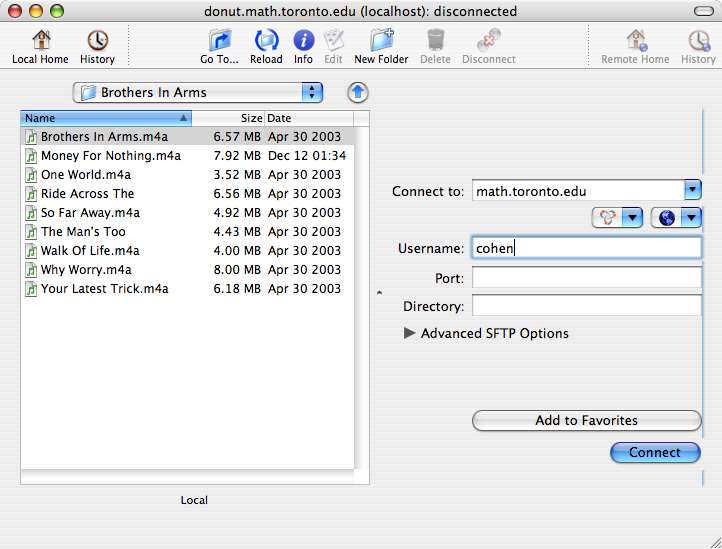
Logged into coxeter
using Fugu
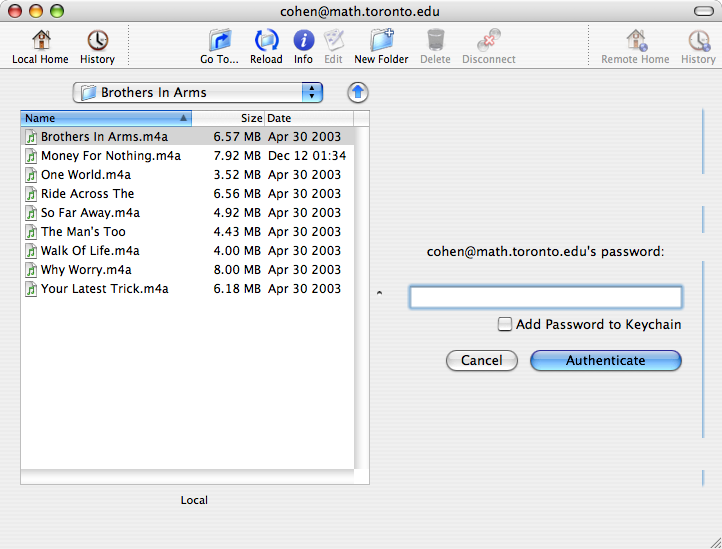
After you enter your login information
[screenshot],
you will be prompted for your password
[screenshot].
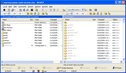
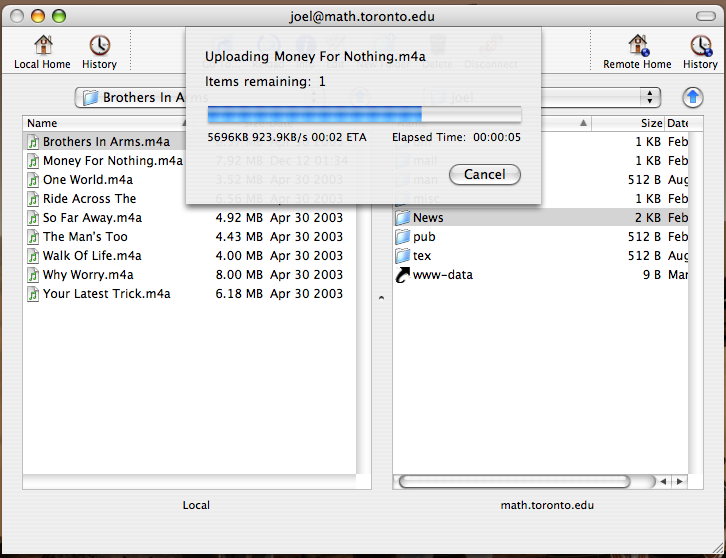
Once you are logged into coxeter, simply drag and drop the files
you wish to transfer between the two computers
[screenshot].

|
If your Macintosh still runs Mac OS 9 or earlier, don't worry; there
are still programs available which allow you to access coxeter by
ssh.
|
Running ssh and scp is available by obtaining
NiftyTelnet
SSH. If you do not require scp or sftp, an alternative
program is
MacSSH. Both
programs are available as free downloads. There are also other programs
available for a small fee.
Other resources
The following is a list of external sites which provide extra
information regarding the SSH protocol and the various clients
mentioned on this web page. Note that the examples they contain use
their hosts, i.e. make sure you use e.g.
coxeter.math.toronto.edu instead.
Return to the [main page]
